A summary of some research undertaken on alternative printing/photography processes using the sun's energy - ahead of the 2017 Lumen Residency. Using the sun as a direct intervention in my practice feels like an interesting approach given much of my practice addresses the world's changing climate. The Lumen Residency is in Lazio, a place, like much of the Mediterranean, which is currently getting seriously frazzled by the sun...
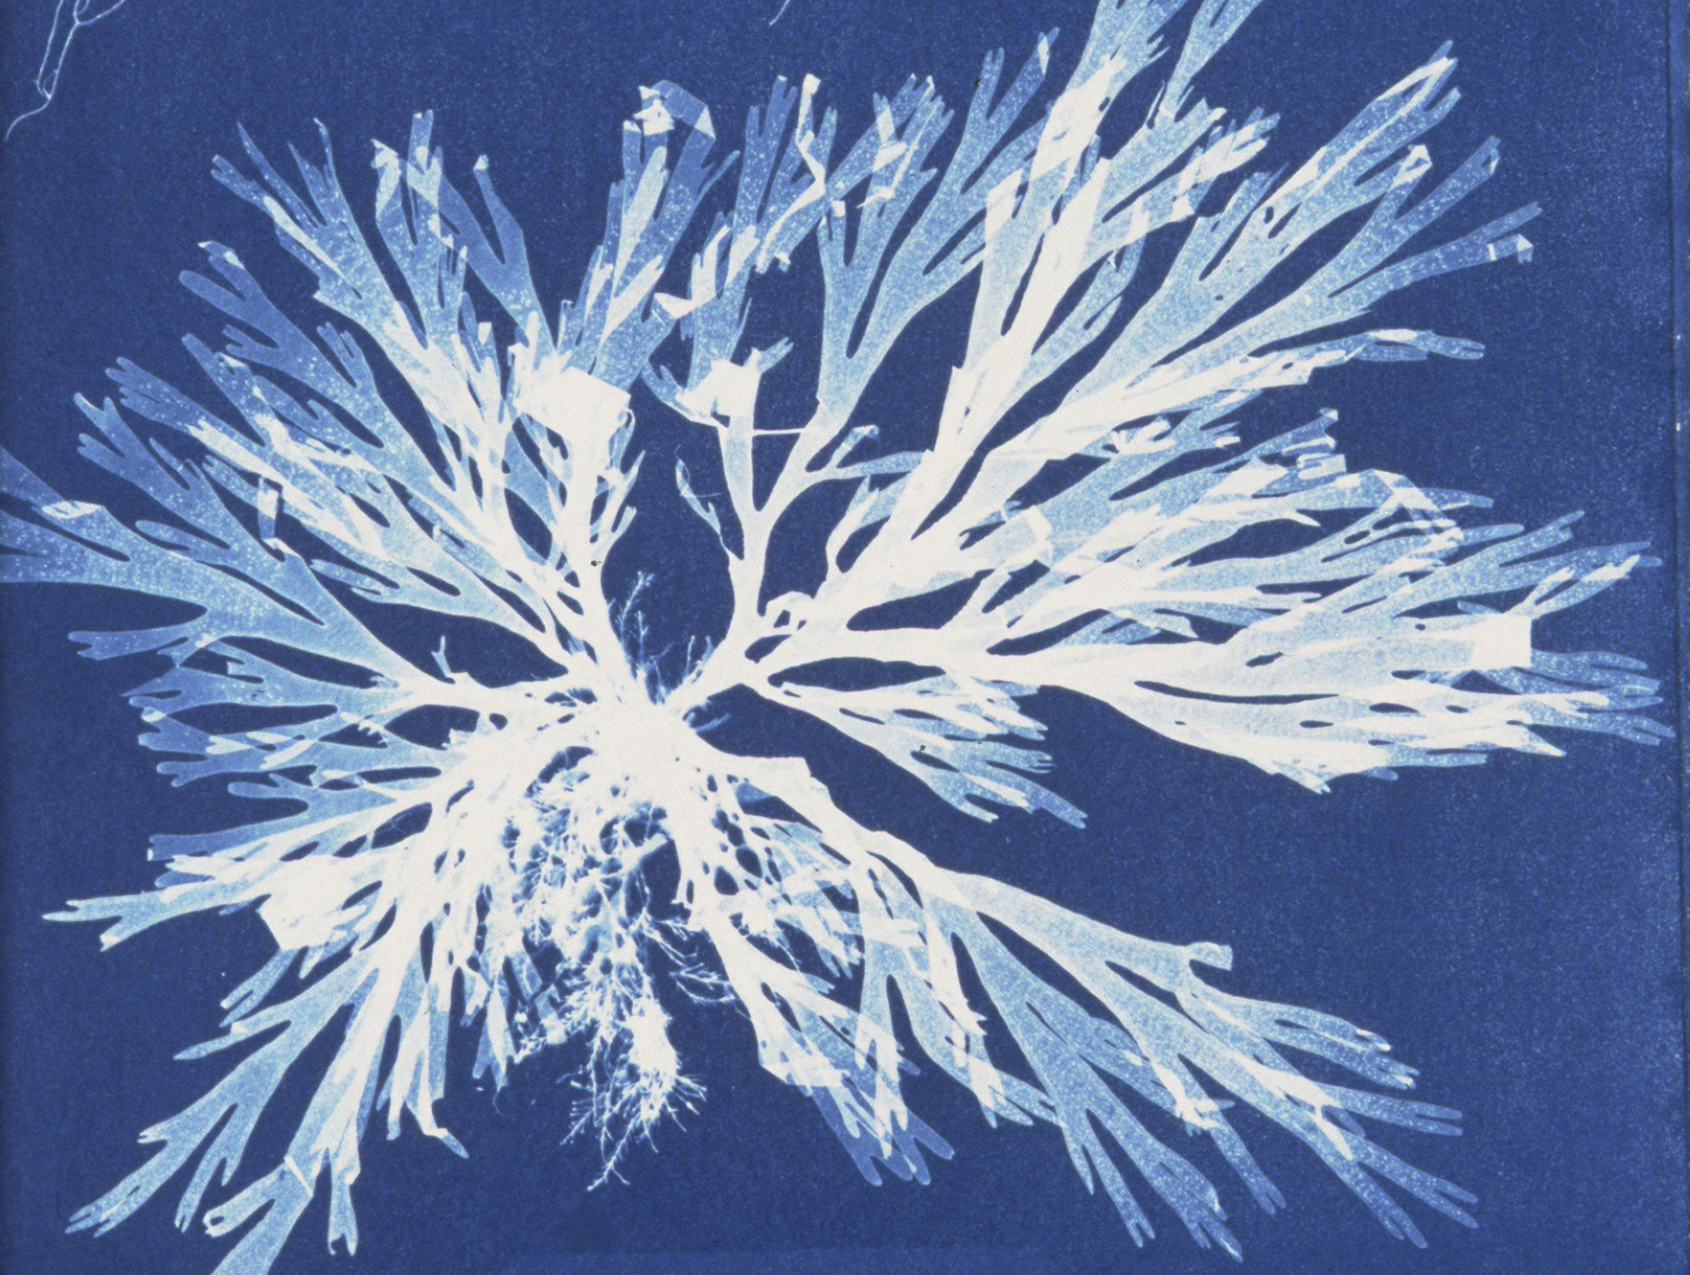
Cyanotypes
Atkins, A. (1849) Dictyota dichotoma, in the young state; and in fruit. Source: From The New York Public Library, available here.
In summary
Mix up a chemical formula: Potassium ferricyanide and Ferric ammonium citrate (green) are mixed with water separately, then two solutions are then blended together in equal parts. Although there are other combinations that work. See here (also references how Cyanotypes are linked to John Herschel).
Apply to a material - paper, board, fabric. If using paper needs to be pretty robust (as later wash). Perhaps not that absorbent?
Cover fabric with a pattern / flower.
Let expose to sun. Again minutes/hours (not seconds).
When ready (the paper starts turning bluish?) - wash paper in water. No fixer or developer required.
Potentially a toner can be used. Short video explaining this here. And this guide, produced by Jacquard, is just brilliant. Tea, coffee, wine...
Good sources of information
https://www.sciencecompany.com/The-Cyanotype-Process.aspx (inc. link to John Herschel).
https://www.youtube.com/watch?v=ozxuEhYQq1I
http://cyanotype.co.uk/toning.html
Lumen prints
Source: LOMODESBRO via Lomography website (Accessible at: https://www.lomography.com/magazine/59543-lumen-printing)
In summary
Old photographic paper
Assemble collage/objects on paper in dark room
Expose by sun, between minutes and hours
Use fixer NOT developer. And use hypo fixer not rapid fixer (I think this product is right, because of the information in the description in this page, and the explanations of name changes provided here & here)
Variables to give different images include: paper type; paper age; exposure time; strength of light; interfering with the paper (e.g. water on it)
distance from surface of objects, transparency etc.
Good sources of information:
https://www.lomography.com/magazine/321837-how-to-make-lumen-prints
http://fstop138.berrange.com/2015/07/an-introduction-to-the-lumen-printing-process/
https://www.lomography.com/magazine/59543-lumen-printing
http://davidarnoldphotographyplus.com/2015/01/17/morning-glories-lumen-print-making/
Here's some information on different types of fixer: https://en.wikipedia.org/wiki/Photographic_fixer
Bromide
Serge (2007) Bromoil Nara. Available at: https://www.flickr.com/photos/10233991@N08/2556359215
In summary
Frankly this one looked a bit more technical and less achievable at short notice, on location at Lumen.
Make a conventional photographic print on Bromide paper (I think this requires darkroom & chemicals which I currently do not have access to).
Make a 'matrix' by applying a solution called bleach-tan (diluted with water) to the print. Fairly precise timings and temperatures required. Once you arrive at the matrix, this is fixed and can be stored indefinitely.
Soak the dried matrix in water. Dry it so there are no droplets.
Apply standard ink with a brush. This then gets picked up in the grooves of the matrix, a bit like an etching.
End up with an inky, handmade and unique version of the original photograph.
NB - the image shown above by Serge is, I think, actually a Photoshop process, and not in fact a genuine Bromide print. It is included here as a) I wasn't impressed by the images available to use online, and b) as it is food for thought - could be a digital process that is relatively accessible for me.
Good sources of information
https://www.silverprint.co.uk/bromoil/
http://www.alternativephotography.com/making-a-bromoil-print/
https://www.flickr.com/photos/10233991@N08/2556359215
Solar Fast Dyes
The Mighty Zorvig (2015), source: https://themightyzorvig.wordpress.com/tag/solarfast/
In summary
Cheating?!
Dyes are produced by a range of companies e.g. Inkodye, Jacquard. Summary of them at the beginning of this video. Seem to be focused on dying T-shirt audience, but I believe can also be used on paper and presumably mounted board.
Appears that you apply the dyes on the surface, and dyes can be thinned with water (see bottom of this page). Dyes can be mixed, applying water directly onto the surface gets a bleeding effect.
Then apply positives onto the surface. E.g. leaves are used in the above image. Most of the instructions I've seen suggest getting the material as tight as possible to the surface to get a sharp image. Of course you can play with that, and get more ghostly shadows by putting objects further away.
Other techniques include: making stencils, potentially on acetate; using salt to give a texture; if using material, folding or scrunching the material.
Then leave assemblage in the sun for a few hours. Results will differ depending on time of day, directness of sunlight, cloud etc. Most seem to suggest a few hours in direct sunlight, so doesn't seem too powerful.
I think the next task is to fix the dye. With some products this seems to involve heat-sealing with an iron. For Jacquard I believe this involves fixing with their Solar Fast Wash in hot water 'agitating vigorously'. Product instructions should explain more.
Sources of information
http://www.georgeweil.com/ProductGroup.aspx?Menu=1&Level1=83&Level2=1209&Level3=0&PID=21368
https://www.youtube.com/watch?v=_3TKb1XHUac
https://themightyzorvig.wordpress.com/tag/solarfast/
From this survey of processes, I am planning on incorporating cyanotypes, lumen prints and solar fast dyes into my practice at Lumen. As far as I can work out, this requires acquiring cyanotype chemicals, soda ash, old photographic paper and a solar fast dye kit. Next stage is to think through some of the subjects and concepts to address using these materials.


